
In this post we will look at how we can create an .EXE software/application in Microsoft Endpoint Configuration Manager. Automating .EXE deployment is much harder than deploying .MSI applications.
We will look at an example (Visual Studio Code) and learn how to tackle with .EXE deployments. From experience, all .EXE applications are packaged different. However, basics remain the same for application deployment. Once you learnt the basics, you could say you mastered the .EXE application deployment.
This post is still in development. Feedback is welcomed 😃
Table of Contents
Background
Well first thing is why we need to deploy an .EXE application?
You will notice some applications are only available as .EXE files and you are stuck with figuring out how to deploy that. The .EXE is different than .MSI files in many ways. One .EXE file can contain one or more .MSI files and you can look into .EXE file with the help of any archiver tools like 7ZIP.
Find Switches
The .EXE application deployment is all about switches.
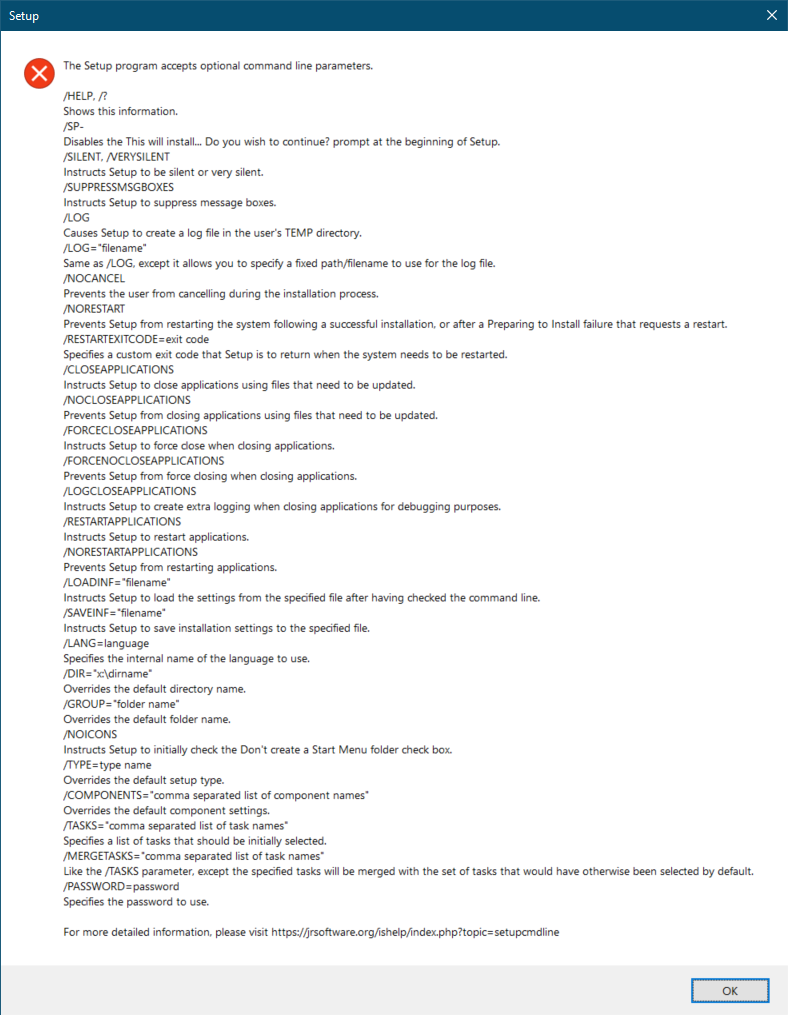
Some vendors do really well and ship detailed documented help with the .EXE file. You can find switches by running the .EXE file in command line with a switch like -help or /help or /?. It depends how the help is implemented with the .EXE.
For instance Microsoft has done really well with Visual Studio Code program.
Hands On
Test it out by yourself, download VS Code from this link. As we are testing on Windows, select system installer on the download page and it will download the .EXE file. Once you have downloaded, browse to the location of this program in PowerShell and run it with a switch /? or /help. You will see the following window.

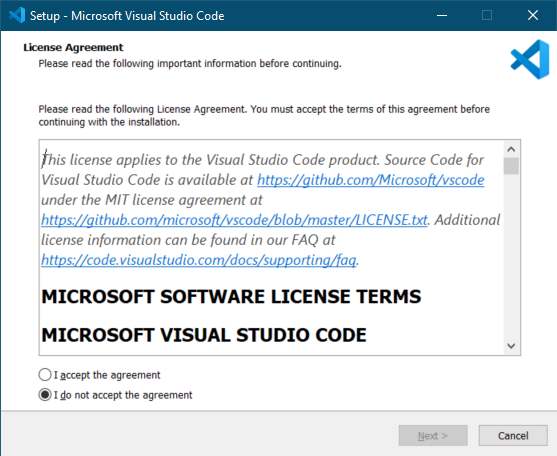
If you run it with a wrong switch and you will see system will prompt for the program installation. Try this with -help and you will see the following window. You can close that as we do not want to install it right now.

Read the help file thoroughly and you will find all the available switches. Check uninstall switch. Did you find it? May be not as it is not available out-of-the-box.
This is the reason why I said earlier the automation deployment of .EXE file is much harder than .MSI.
To find the uninstall switch, we need to install VS Code and see if this gives us an uninstall.exe somewhere in the VS Code’s installation directory.
Silently Install Visual Studio Code
Let’s install VS code silently and then we will look into how to figure out uninstall method.
Find the requirements of the application to install it silently. List the steps you need for this application to install. You may find something like listed below:
- No GUI
- Restart required or not
- System/user install
Consider the requirements and then find the switches to meet your requirements. In some cases, you do not need any switch because that might be the default behavior of the installation.
Let’s break down the above requirements and find what switches these required. Run VS Code in PowerShell with -help switch to find all the switches.
No GUI
There are a few different options in the Help. We have /SILENT, /VERYSILENT and /SUPPRESSMESSAGEBOXES. We will pick /VERYSILENT switch.
Restart
Some applications they might need a restart to work right after the installation. Visual Studio Code does not need a restart to work after installation. It won’t prompt the system to restart by default. We can still use /RESTART switch.
System/user install
The downloaded file is a system installer itself. We don’t need to specify any switch. Some .EXE might have a switch to pick user or system installation.
Hands on
This is how my final installation one line PowerShell command looks like:
.\VisualStudioCode.exe /VERYSILENT /NORESTART

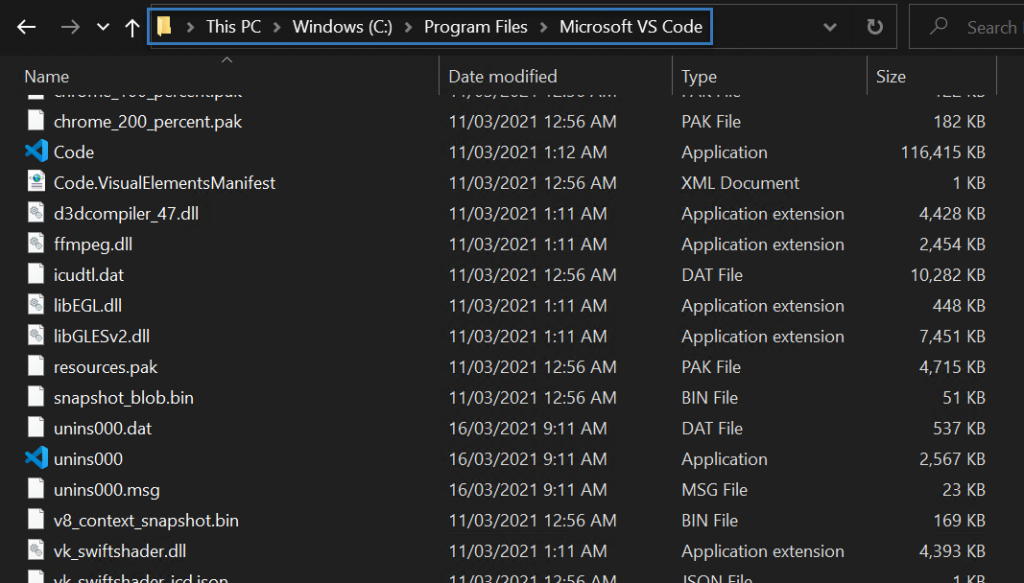
Locate VS Code installation directory
Depends on the 32-bit or 64-bit, check %Program Files (x86)% or %Program Files%. In my case, it is 64-bit installation and I spotted the installation in the below folder.
C:\Program Files\Microsoft VS Code
Silently Uninstall Visual Studio Code
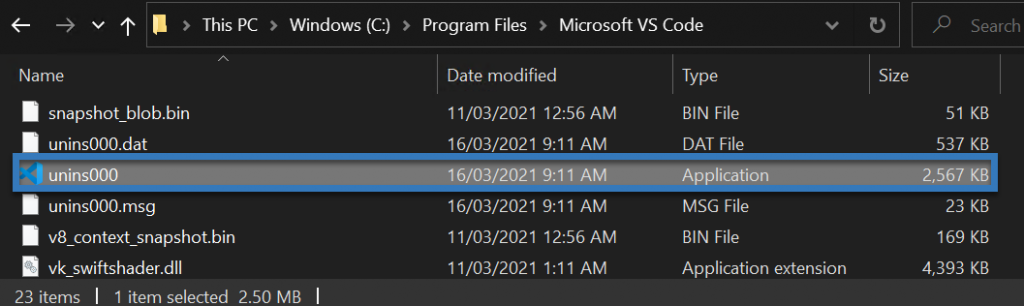
Check the installation folder of Visual Studio Code.
Did you find anything starting with unins?
Yes, there is a file named unis000. This is another .EXE file we have to deal with.
Switches are the same as installation, and uninstallation will look something like this:
.\unins000.exe /VERYSILENT /NORESTART

Create a New Application in ConfigMgr Console
Once we have figured out silent installation and uninstallation methods, we are ready to create the new application in ConfigMgr Console.
- Browse to \Software Library\Overview\Application Management\Applications
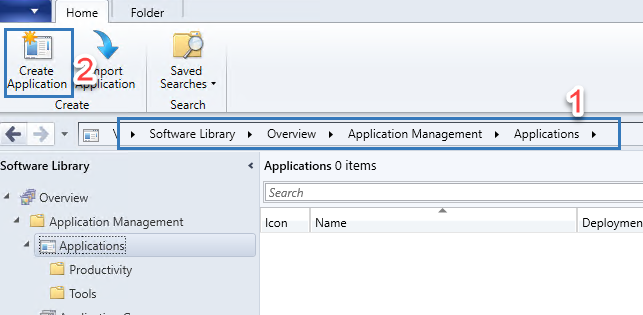
- On the Home tab in the Create group, click on Create Application. This will open a Create Application Wizard
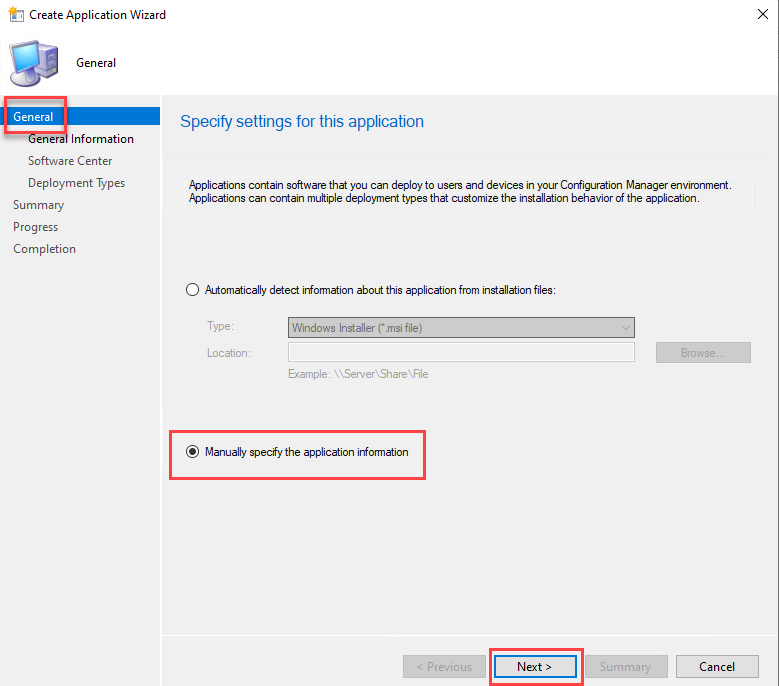
- In the Create Application Wizard, select Manually specify the application information and click Next
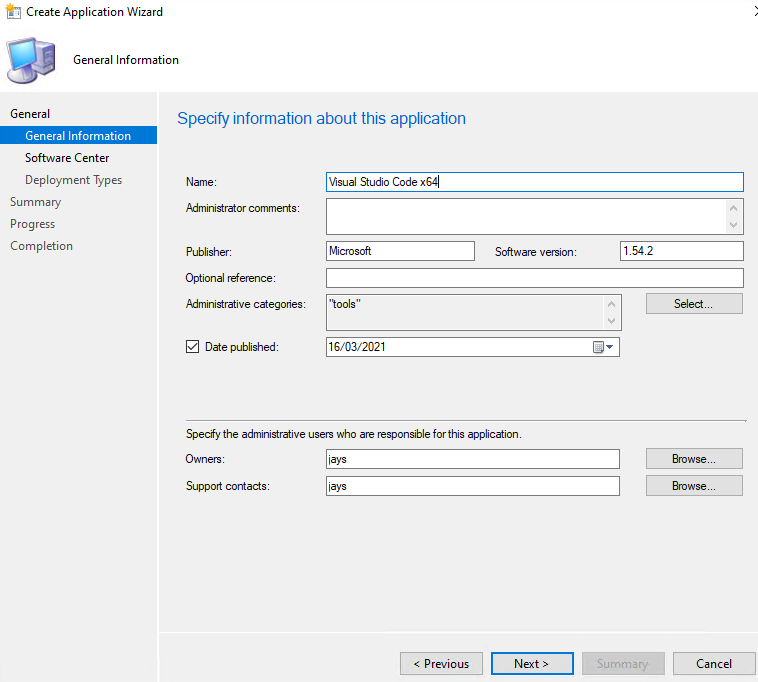
- Fill in the General Information about the application and click on Next
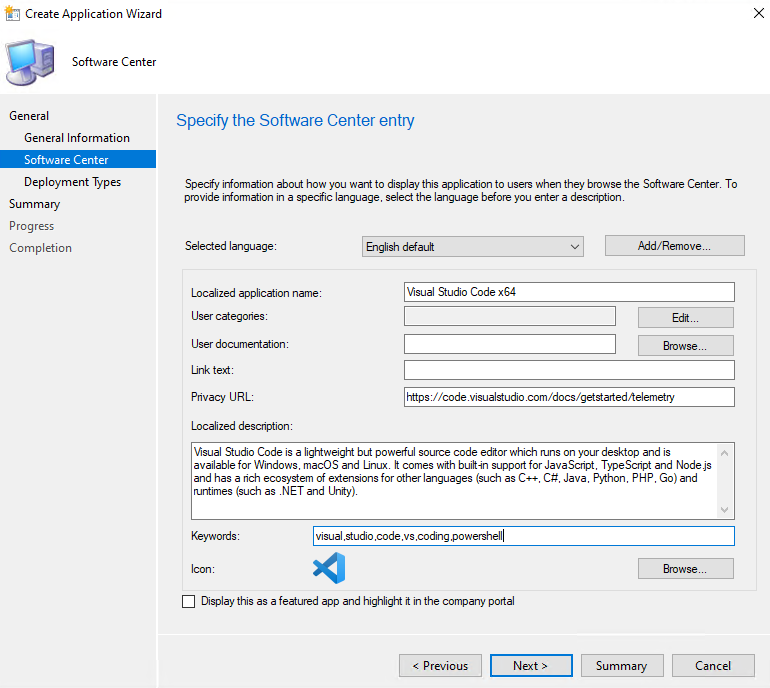
- Provide information which will be seen by the end users in the Software Center and click Next
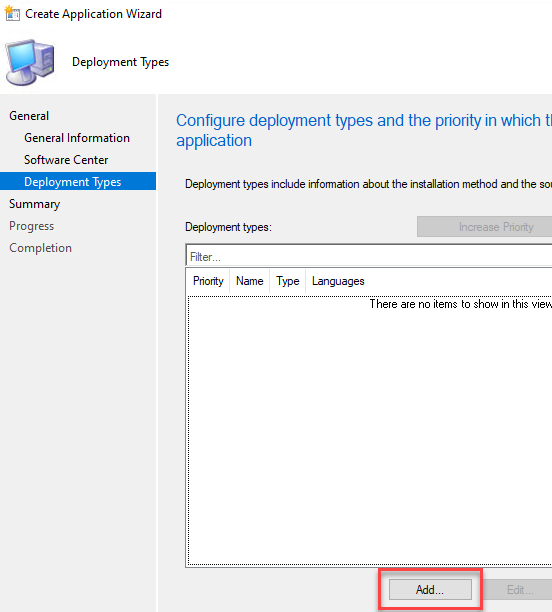
- Click Add on the Deployment Types and this will open Create Deployment Type Wizard
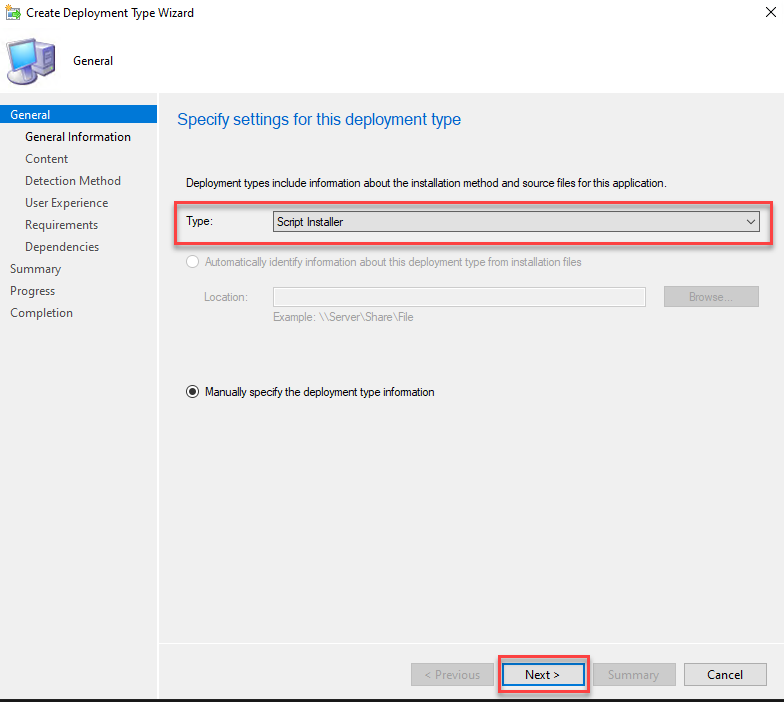
- In order to deploy .EXE file, in Type drop down select Script Installer and click Next
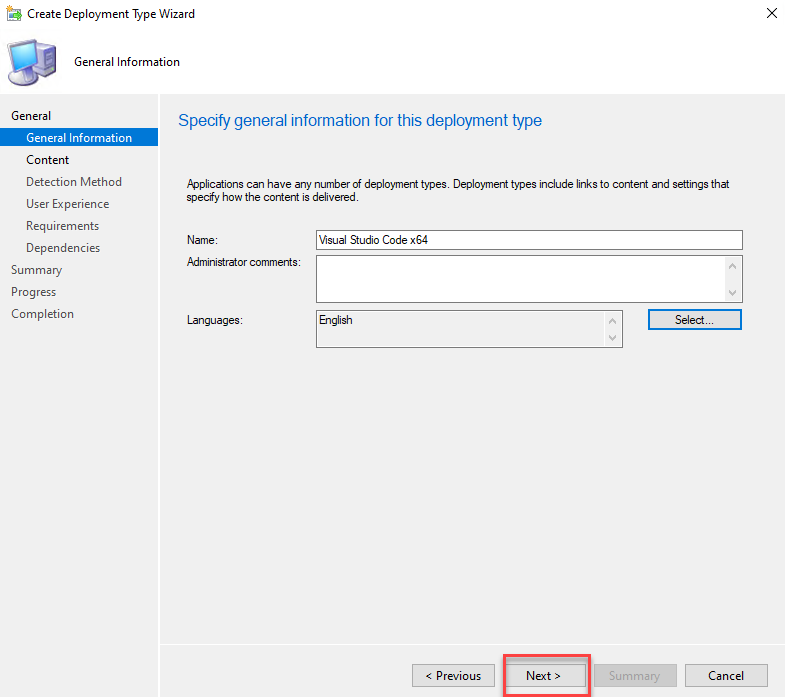
- Provide General Information for this installation type and Click Next. You would be able to view this information in the details pane under deployment types after finish these steps.
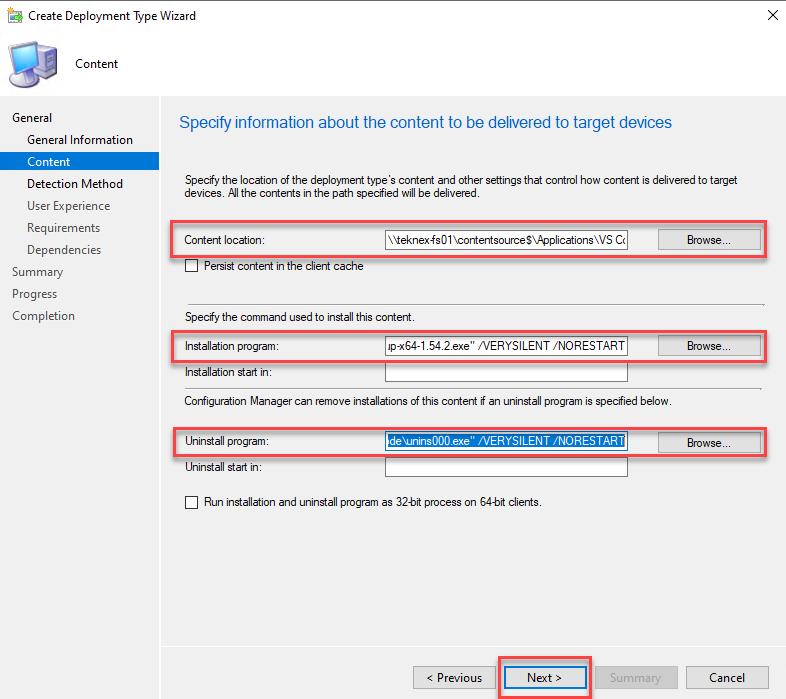
- Provide the following information:
Content location: Browse to File Share where VS Code installation files are saved.
Installation Program: Ensure this matches your version of program. I will be using the command we prepared earlier in this post with the VERYSILENT and NORESTART switch."VSCodeSetup-x64-1.54.2.exe" /VERYSILENT /NORESTART
Uninstall Program: We looked at the uninstall silent command as well. Enter this here including any variables if required. For instance, unis000.exe is saved in “C:\Program Files” and I will use %ProgramFiles% environment variable (for 64-bit programs only).
"%ProgramFiles%\Microsoft VS Code\unins000.exe" /VERYSILENT /NORESTART
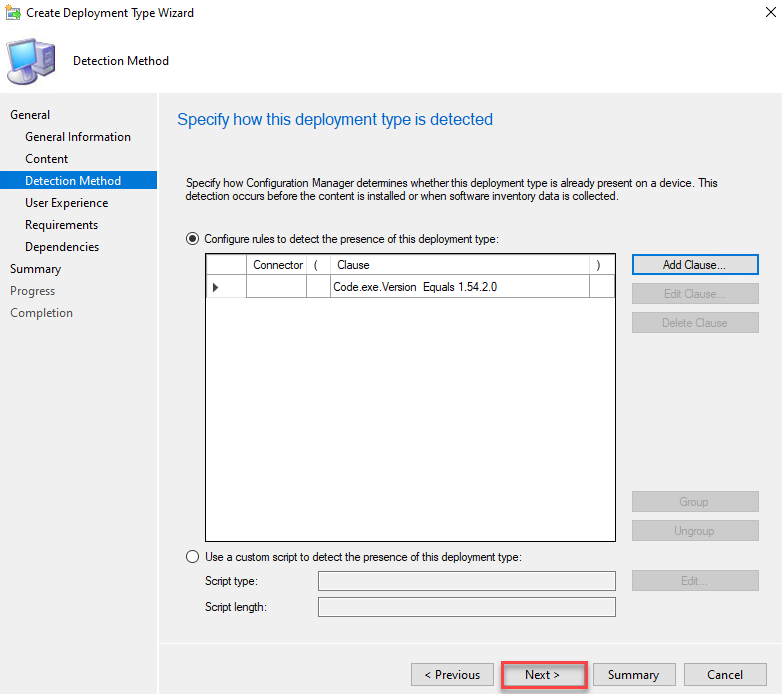
- With the help of Detection Method, Software Center decides whether the application is installed on the device or not.
Unlike .MSI file, you cannot just browse to .MSI file path and define the detection method. We have to come up with a creative method to detect the installed application.
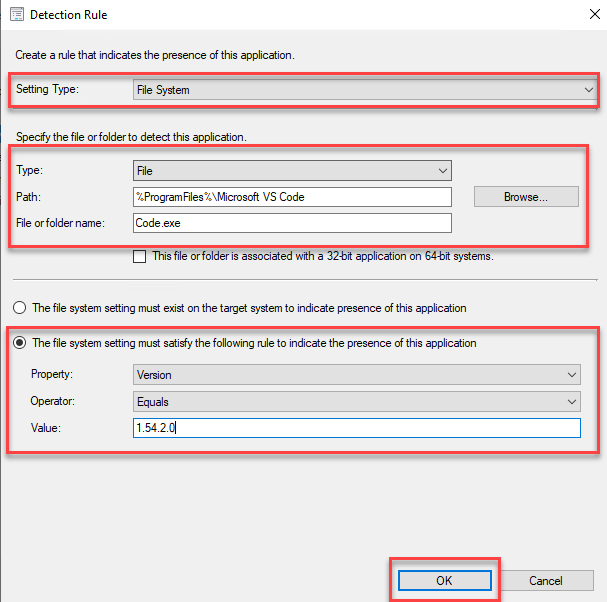
One of the widely used detection method for .EXE files is the check file name and it’s version in a specific folder.– Click on Add Clause and system will open Detection Rule window
– Setting Type: File System
– Type: File
– Path: Path to the file which must be present on the end user device to determine whether the application is installed or not. Enter the installation Path of VS Code with the environment variable.%ProgramFiles%\Microsoft VS Code
– File or folder name: Here we will use a file called Code.exe which is present in the Visual Studio Code’s installation directory.
– Change the next settings to “The file system setting must satisfy the following rule” and enter the required information as shown in the screenshotClick OK once you filled all the information.
- Click Next on the Detection Method window
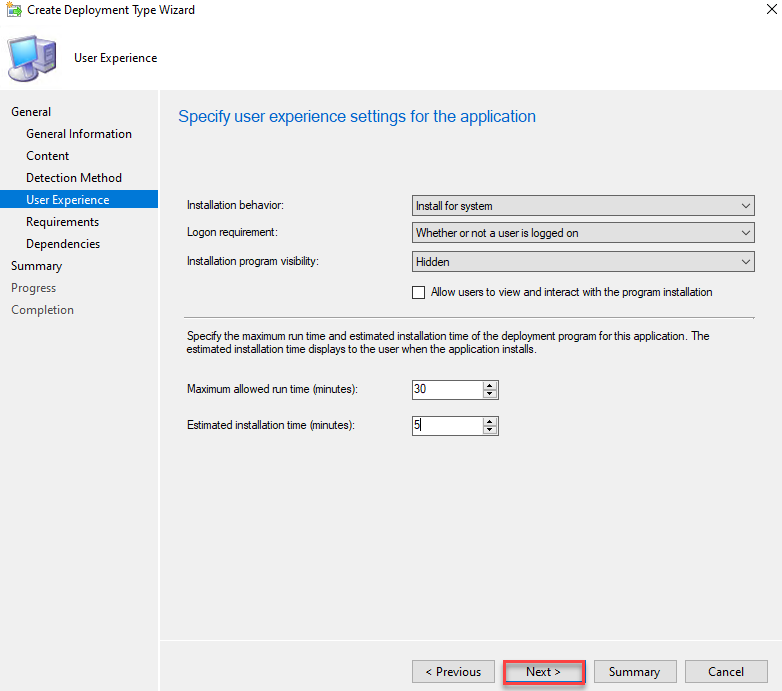
- Update the User Experience as follows and click on Next. You can change these settings to suit your needs.
- For this application there are no Requirements and click Next. There are no Dependencies and click Next.
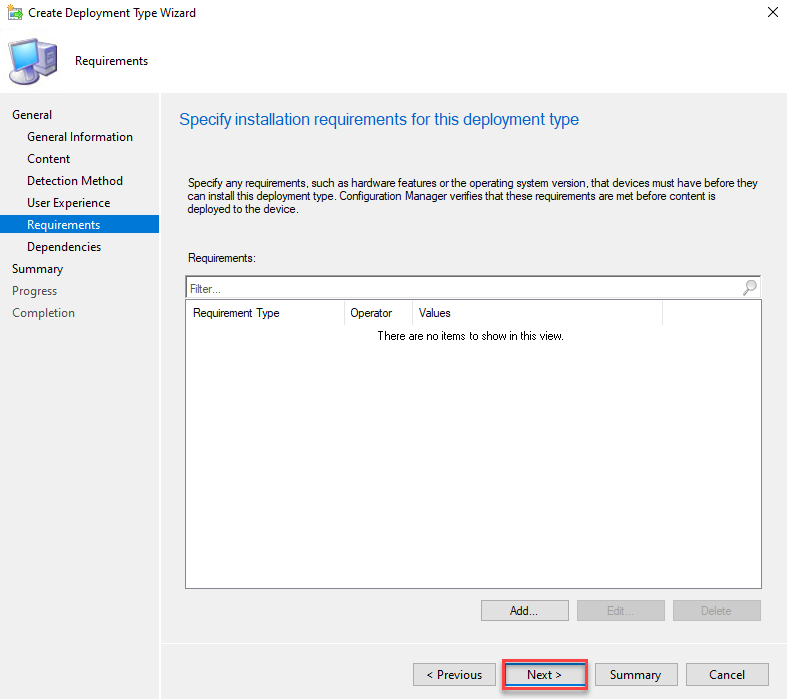
Requirements 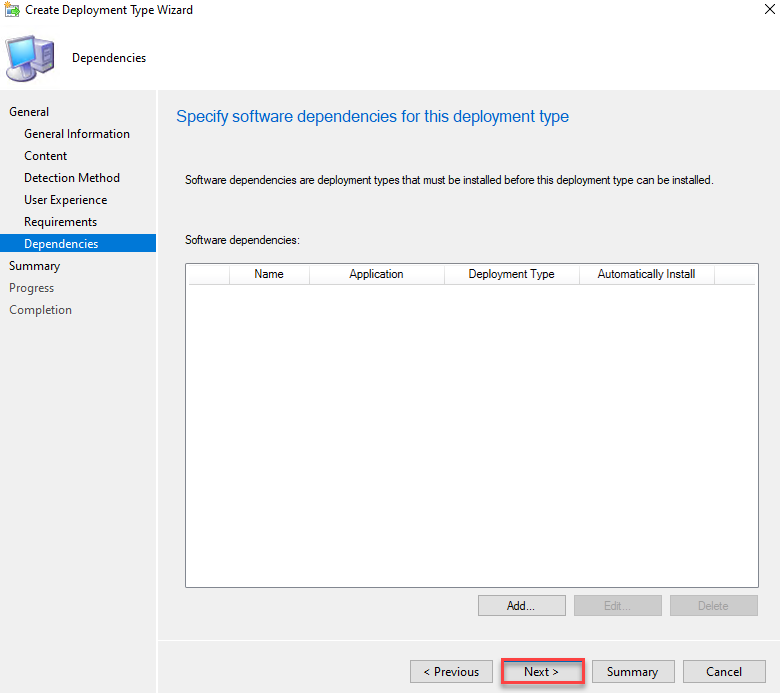
Dependencies - You will see the Summary screen and click Next. You will see a message “The Create Deployment Type Wizard completed successfully” and click on Close. This will take you back to the “Create Application Wizard“.
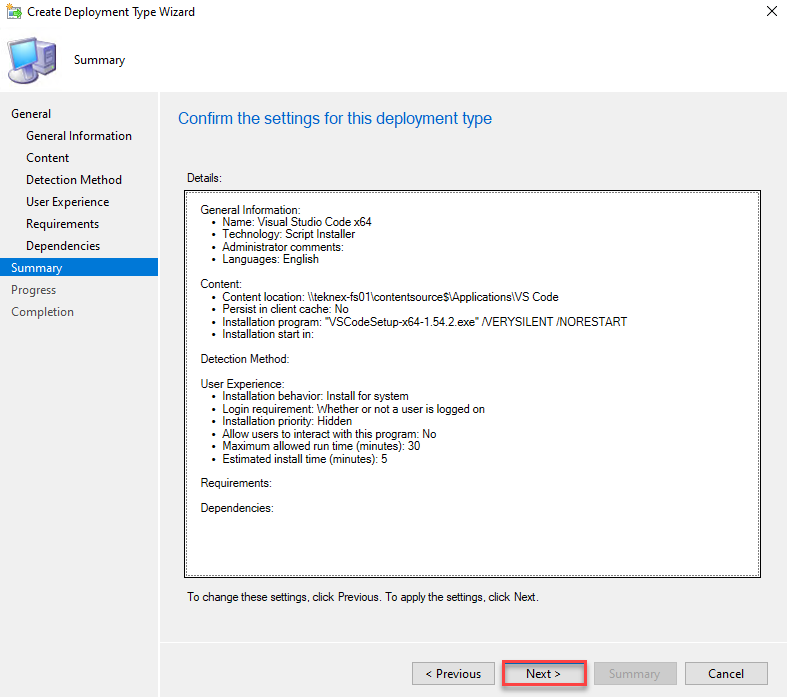
Summary 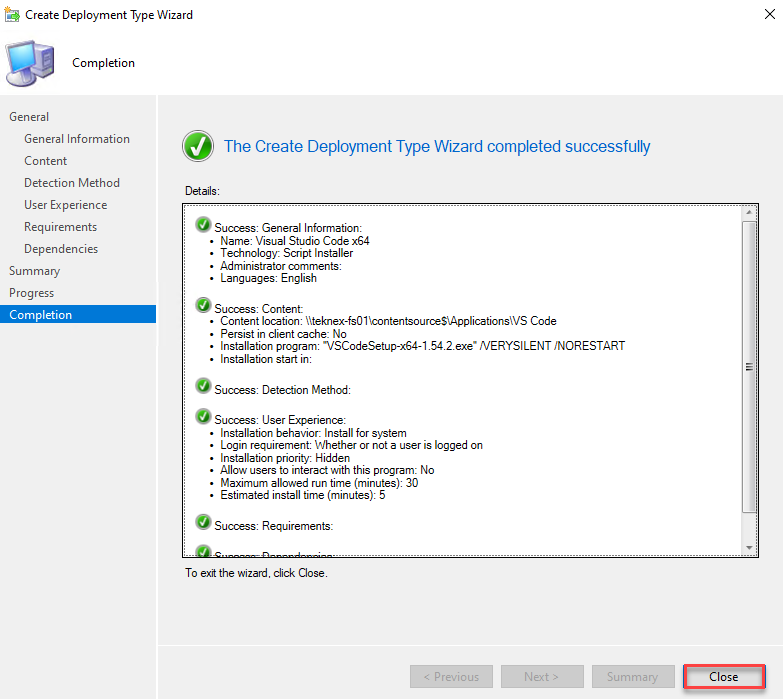
The Create Deployment Type Wizard completed successfully - Click Next on Deployment Types, then Click next again on the summary page. You will see Progress and then finish it off on the Completion window by clicking Close
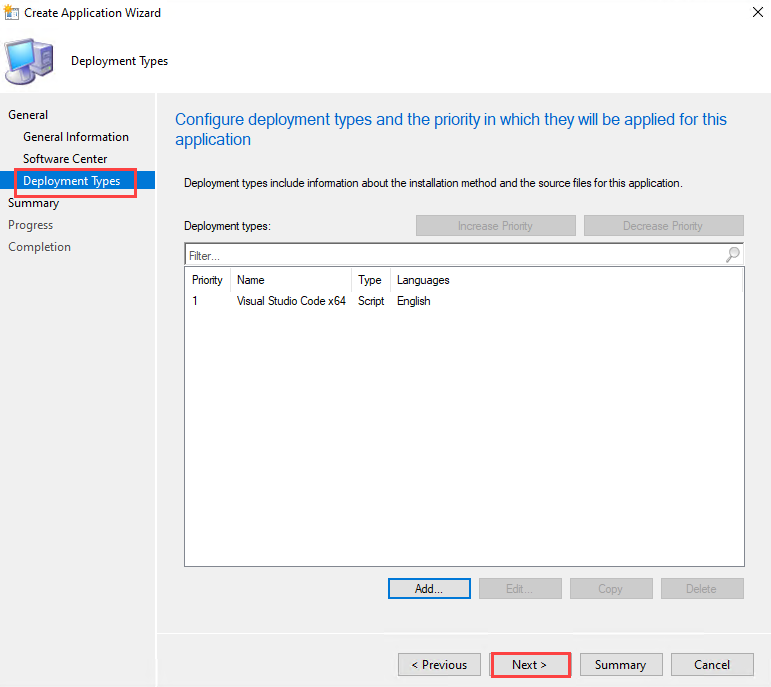
Deployment Types window 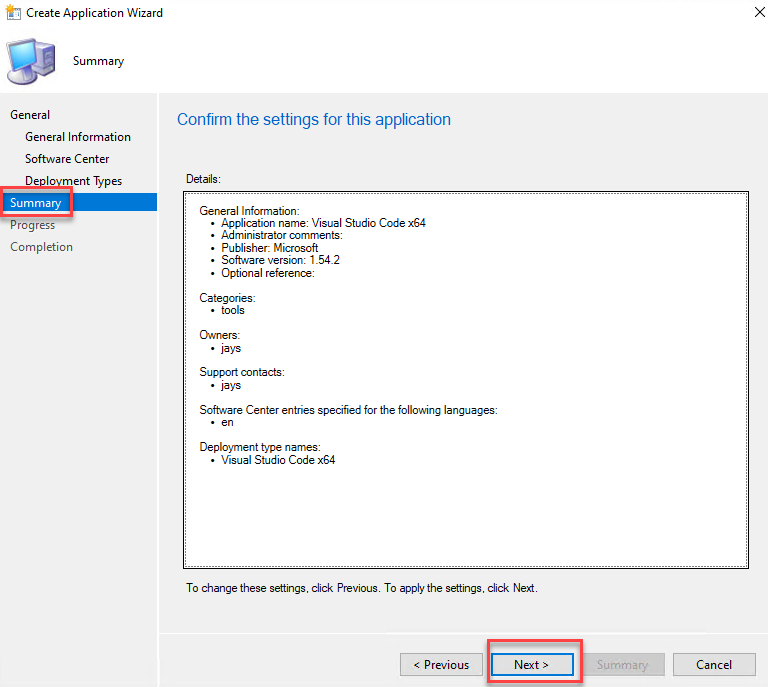
Summary window 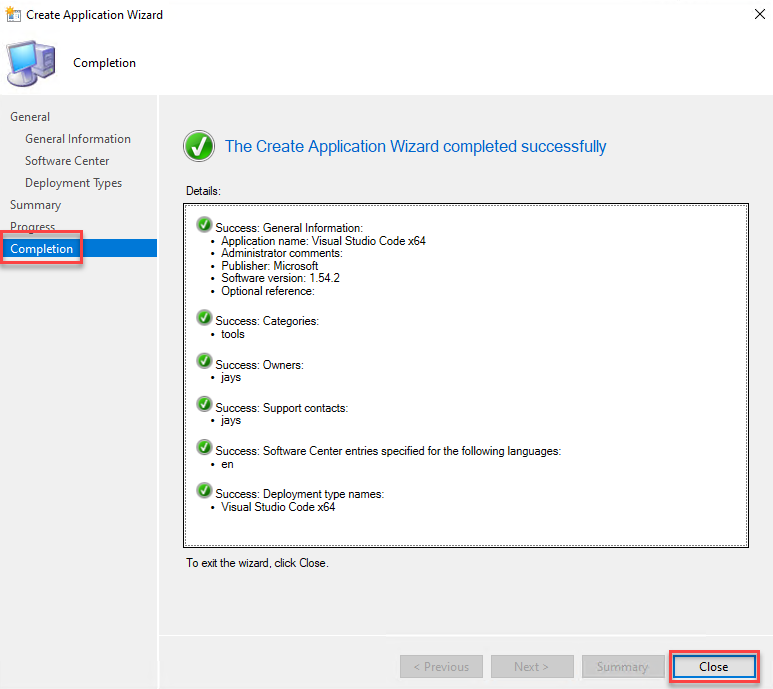
Completion window
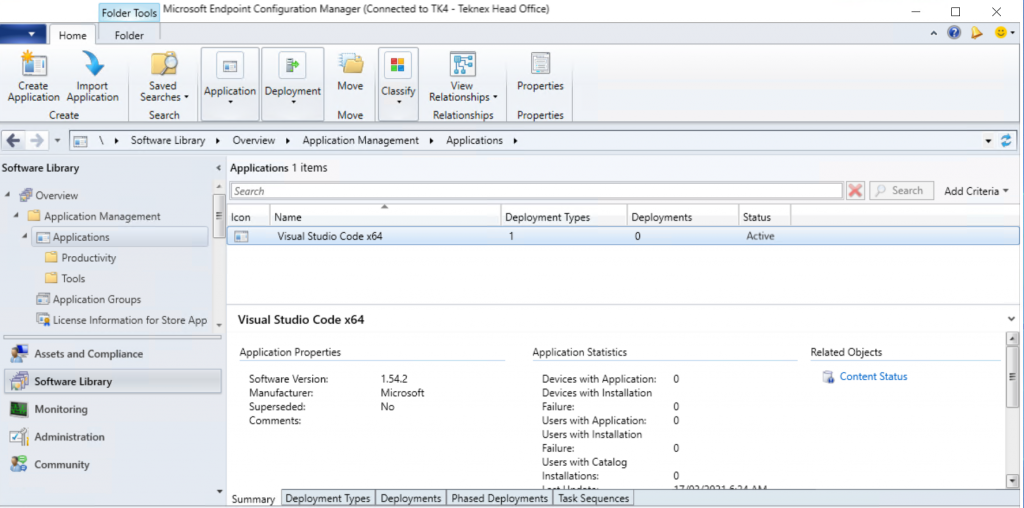
That was a lot to go through. Hard work pays off 😃. You will see the following application in the ConfigMgr console.
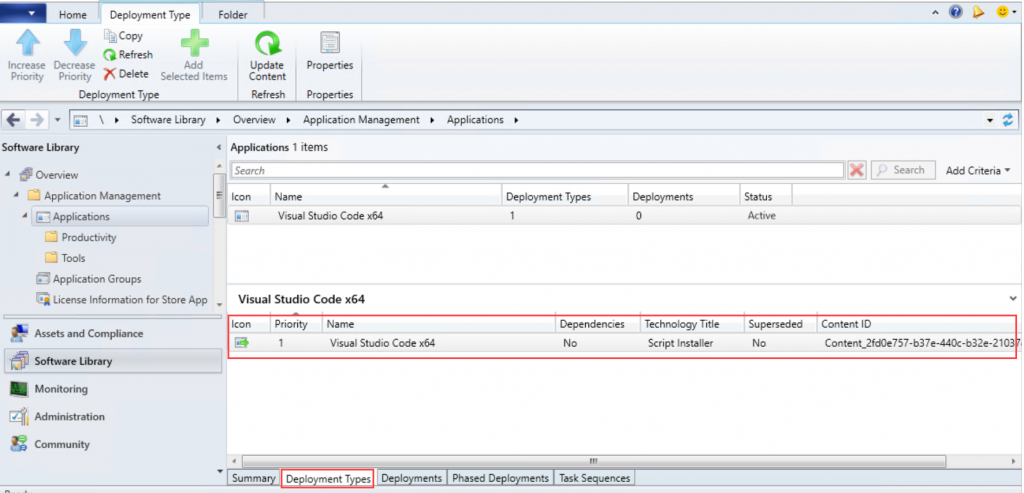
Change view to Deployment Types in the details pane and you can see Visual Studio Code’s Script Installer deployment.


May 11, 2021 @ 1:18 pm
I have an .EXE application that requires running elevated CMD to install the app.
What command can I use in SCCM ?
July 29, 2021 @ 11:47 am
Hi Jay,
I’m using Azure endpoint. Is it possible to use these instructions to put a “line-of-business app” in Azure?