
In this blog, we will install Zabbix 5.4 on Ubuntu Server.
Last updated on 22nd September 2021
This blog is specifically targeted at Zabbix 5.4. Check the life cycle of Zabbix versions below before selecting the latest version (Zabbix 5.4 at the time of writing this blog). I would recommend to go for Zabbix 5.0 LTS unless you need a functionality not offered by this version. Check Zabbix link for further information on Zabbix life cycle.
| Release name | Release date | End of Full Support | End of Limited Support |
| Zabbix 5.4 | May 17, 2021 | Nov 30, 2021 | Dec 31, 2021 |
| Zabbix 5.2 | Oct 27, 2021 | Jul 31, 2021 | Jul 31, 2021 |
| Zabbix 5.0 LTS | May 12, 2020 | May 31, 2023 | May 31, 2025 |
| Zabbix 4.0 LTS | October 1, 2018 | October 31, 2021 | October 31, 2023 |
Make sure you have an Internet connection on your Ubuntu Server and it is up-to-date as well. Run the following commands to update/upgrade the list of available packages.
sudo apt update && sudo apt upgrade
Table of Contents
1. Select Zabbix Version
Head down to zabbix.com/download and select the Zabbix Version, OS Distribution, OS Version, Database and Web Server. I will be using the following:
| ZABBIX VERSION | OS DISTRIBUTION | OS VERSION | DATABASE | WEB SERVER |
| 5.4 | Ubuntu | 20.04 (Focal) | MySQL | Apache |
Perform the first step and Install the Zabbix repository. In my case, it is Zabbix 5.4 and it could be different when you are following this blog.
wget https://repo.zabbix.com/zabbix/5.4/ubuntu/pool/main/z/zabbix-release/zabbix-release_5.4-1+ubuntu20.04_all.deb
Once the repository is downloaded, run the following command to install it.
sudo dpkg -i zabbix-release_5.4-1+ubuntu20.04_all.deb
This is important, otherwise, you will run into problems. Update/Upgrade the installed packages with the following command.
sudo apt update && sudo apt upgrade
2. Install Zabbix Server, frontend, agent, and database
Now we will install Zabbix server, frontend, agent, and database. I have added additional bit mysql-server to the official Zabbix command because without that I could not run mysql_secure_installation command.
sudo apt install zabbix-server-mysql zabbix-frontend-php zabbix-apache-conf zabbix-sql-scripts zabbix-agent mysql-server
3. Check Versions
Check all the software versions you have installed. Here you can check the supported versions
MySQL server version
sudo mysql -V
Apache version
sudo apache2 -V
PHP Version
sudo php --version
4. Configure MySQL Server
This is again missing in the official documentation, let’s secure our MySQL server and give a password to the root user:
sudo mysql_secure_installation
- yes or no, if you would like to install Validate Password Plugin (I said no for this in my lab environment)
- The next part offers you to change the password for the root of MYSQL
- The next option to remove anonymous users, I will say Yes
- The next option to stop root login remotely, I would go for no
- Reload privileges table: Yes
- You will see, “All done”, once it is all done
5. Create an initial database and a user
| Database | zabbix |
| User | zabbix |
| Password | password |
1. Let’s login to MySQL server and provide the MySQL root password which you entered in the previous step.
sudo mysql -u root -p
2. Create a database and name it zabbix.
create database zabbix character set utf8 collate utf8_bin;
3. Create a new user and name it zabbix. Also, pick a password for this user. We will need this password later on for Zabbix server config file.
create user zabbix@localhost identified by 'password';
4. Now grant permissions on zabbix database to user zabbix.
grant all privileges on zabbix.* to zabbix@localhost;
5. Once done, flush the privileges.
flush privileges;
6. Confirm privileges for user zabbix on database zabbix.
show GRANTS FOR 'zabbix'@'localhost';
7. Let’s get out of MySQL
quit;
6. Import initial schema and data.
In the previous step, we created a new database and user. Now we will utilize that database and import initial schema and data to that database. Run the following command and provide the password for the database user zabbix. Be patient with this command and it could take 5 to 30 seconds or more to finish.
sudo zcat /usr/share/doc/zabbix-sql-scripts/mysql/create.sql.gz | mysql -uzabbix -p zabbix
Verify the schema is imported successfully to database zabbix.
- In order to do that, we have to log in to MySQL server with MySQL user root and provide the password when prompted
sudo mysql -u root -p
- Use database zabbix, where we imported initial schema and data
use zabbix;
- So we are now in database zabbix. Let’s see the tables
show tables;
- You should see the tables on the screen. Let’s get out of MySQL server
quit;
7. Update Zabbix Server Config file
Well! this file has a lot of stuff. We will update only one thing, however, this is the place where you tune up your Zabbix server. We will update the zabbix server password only. If you have used different zabbix database name, consider updating that as well.
sudo nano /etc/zabbix/zabbix_server.conf
Let’s find the keyword DBPassword
Hit Ctrl + W on your keyboard, type DBPassword, and then hit Enter on your keyboard. You should see #DBPassword. Update it as follows:
DBPassword=password
Once you have made the above change, then use the following on your keyboard to save the file:
Ctrl + O and Ctrl + X
8. Configure PHP for Zabbix frontend
We will edit /etc/zabbix/apache.conf file to update the timezone. Here is the list of timezones and find yours.
sudo nano /etc/zabbix/apache.conf
Look for # php_value date.timezone Europe/Riga below PHP 7.0 configuration and update your timezone accordingly. Mine looks like this
php_value date.timezone Australia/Melbourne
Once you have made the above change, then use the following on your keyboard to save the file:
Ctrl + O and Ctrl + X
9. Start Zabbix server and agent processes
Alright, now it is the time to start Zabbix server and agent.
sudo systemctl restart zabbix-server zabbix-agent apache2
Let’s add Zabbix server and agent services to auto start at system boot
sudo systemctl enable zabbix-server zabbix-agent apache2
10. Configure Front End
All the hard work is done and now let’s finish it off through a web browser. Make sure your system can ping the Ubuntu server from where you are accessing the browser.
- Open your favourite browser and open Zabbix by typing the following:
http://Your_IP_Address/zabbix
In my case, it will look like http://172.24.188.94/zabbix. You should see the front end welcome screen.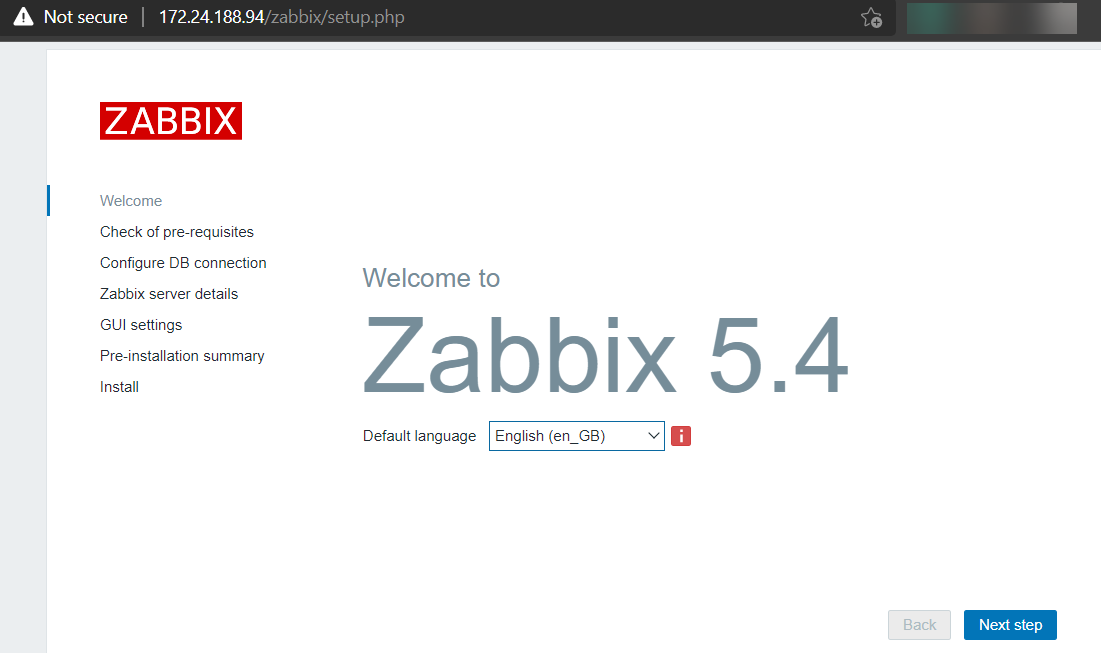
- You will check of pre-requisites step and make sure everything is ok before proceeding further
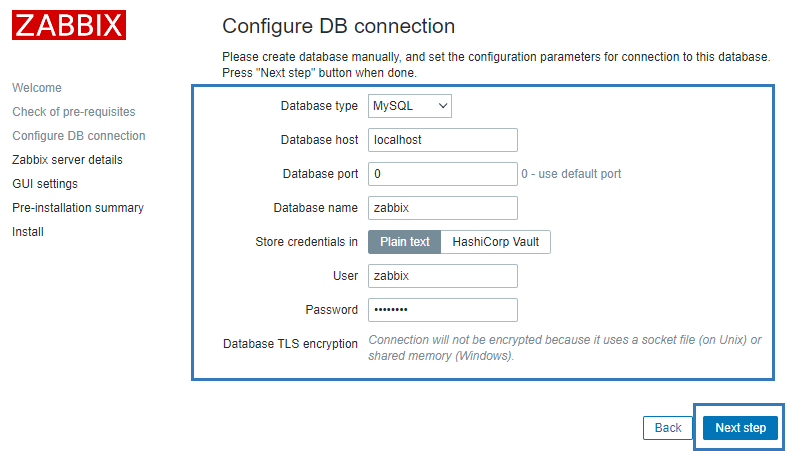
- Provide the details of zabbix database we configured earlier and click on the next step
- Update the name, I will call it MMDM-NETMON01 and click on the next step
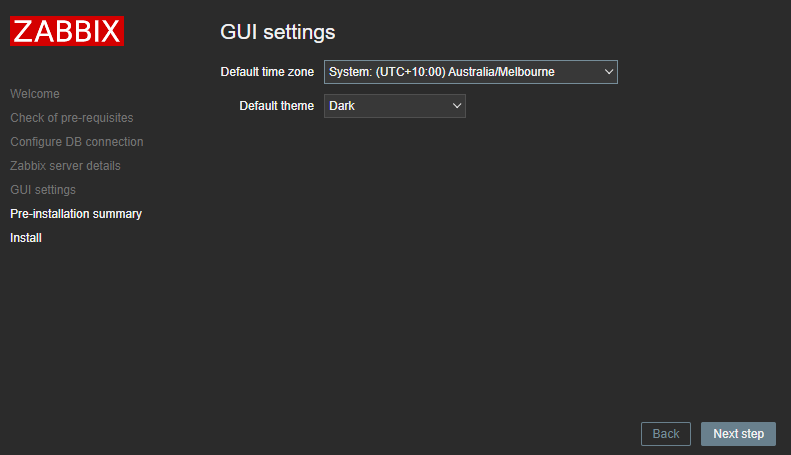
- Update GUI settings according to your needs and click Next step
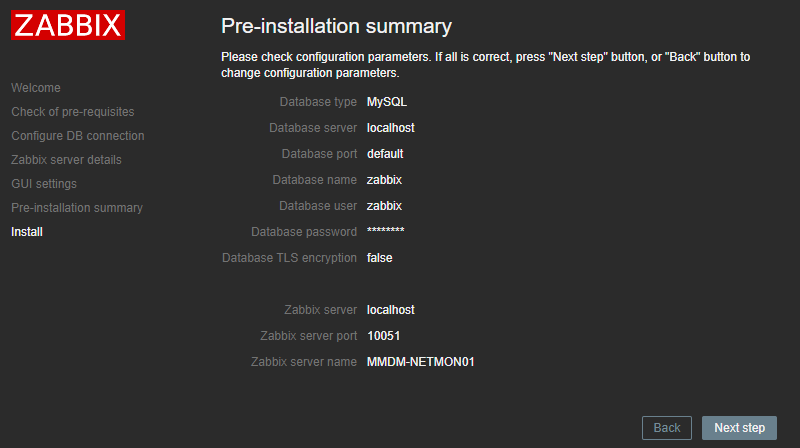
- You will see the pre-installation summary and click Next step
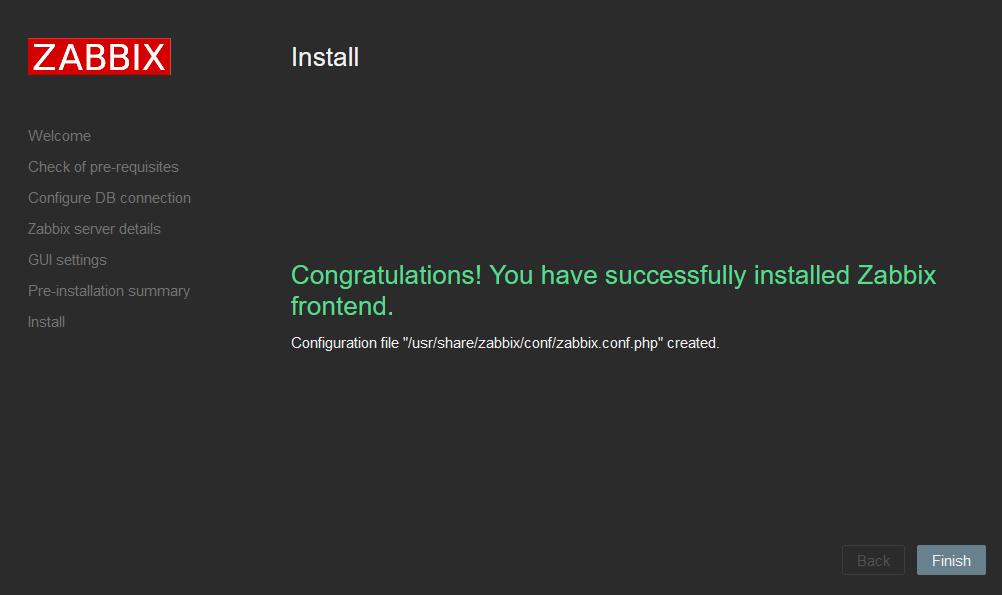
- Well I welcomed by the following screen
11. Login to Zabbix
The default credentials are as follows:
Username: Admin
Password: zabbix
Note: Username is case sensitive.
Well that is all. Let me know how did you go with your setup along with your current configuration (Ubuntu Version, MySQL Version, PHP Version and Apache Version)


September 27, 2021 @ 10:48 pm
Thanks for this installation guide!
I have a problem though.
My zabbix server doesn’t seem to start correctly.
When I look into the log file I see that it can’t connect to the database
connection to database ‘zabbix’ failed: [1045] Access denied for user ‘zabbix’@’localhost’ (using password: NO)
Would you know how I can solve this?
Kind regards,
Wouter
September 29, 2021 @ 2:30 pm
Seems like a permissions issue. Double check user zabbix permissions on the database.
February 17, 2022 @ 2:12 am
Great tutorial, can you please make video tutorial how to monitoring Docker containers?