
This post is refined version of original LinkedIn post Snipe-IT Configuration On Ubuntu in which we installed step by step Snipe-IT on Ubuntu Server. You would be able to copy all the commands much easier through this post.
Last updated on 14th August 2021
Working Config:
PHP 7.4.3
MySQL 8.0.26
Apache 2.4.41
Snipe-IT 5.1.8 build 6227
Requirements for this guide to follow
- Ubuntu server up and running
- Static IP assigned to the server
- Internet connectivity
- Logged in with user account created during Ubuntu server installation or Root user (logging in as root not recommended)
Table of Contents
1. Connect to Ubuntu server
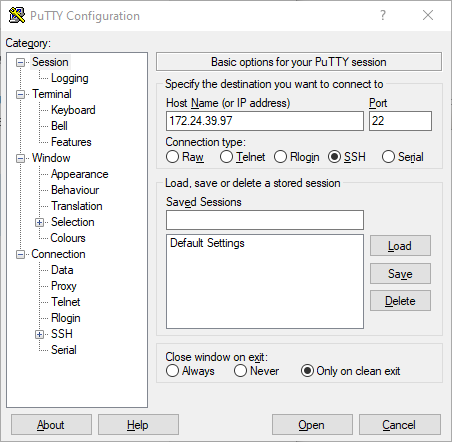
Highly recommend to use a SSH client for connectivity and it will make easy to copy/paste commands as compare to directly interacting with your Ubuntu server console.
I will be using Putty as SSH client. Here is the direct link to download Putty or you could use your preferred SSH client.
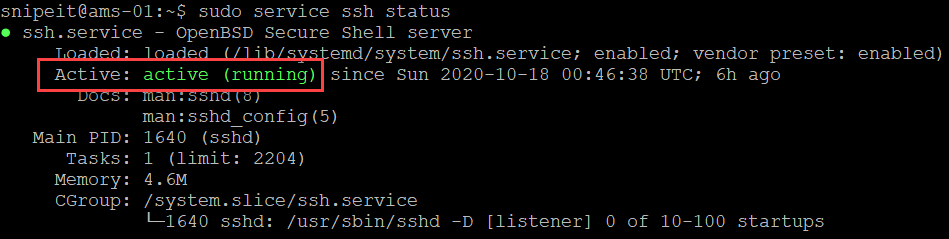
OpenSSH server status/installation
- OpenSSH is already installed. You can check SSH server status
sudo service ssh status
- If Open SSH server is not installed, you can install it by using the following commands:
sudo apt install OpenSSH-Server
- Verify Open SSH server status
sudo service ssh status
- Open SSH server’s configuration file is located here, file name is sshd_config. Open SSH should work out of the box, however, you can edit it if needed with your preferred choice of editor
cd /etc/ssh

2. Update/Upgrade installed packages
Update and upgrade installed packages on Ubuntu server. You will need to run this command as sudo and enter ‘y’ when prompted to confirm.
sudo apt update && sudo apt upgrade

3. Install Apache, MySQL and PHP
You can use a repository like tasksel to install LAMP server components. Otherwise, you can install individual components.
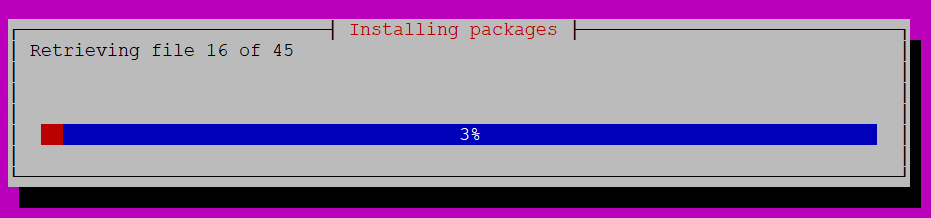
Install Apache, MySQL and PHP using tasksel
sudo apt install tasksel
sudo tasksel install lamp-server
Check versions
- MySQL server version
sudo mysql -V
- Apache version
sudo apache2 -V
- PHP Version
sudo php --version
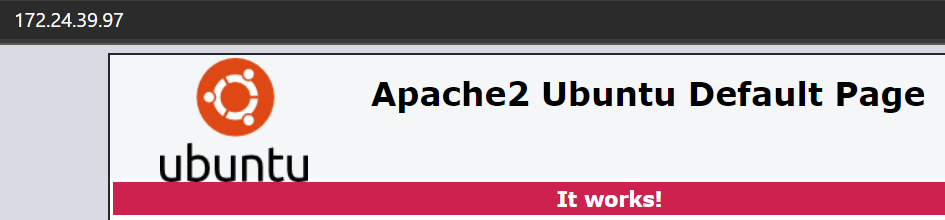
Test Installation
- Apache: Browse to IP address of your server and you should see Apache generic web page
- MySQL: Run the following command to see the status of MySQL Server
sudo service mysql status
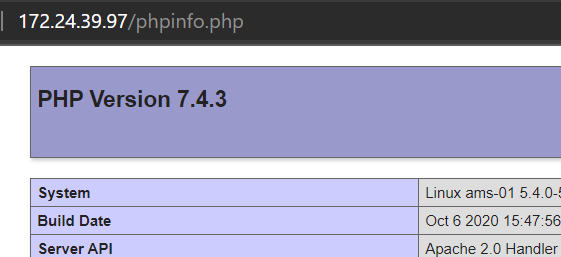
- PHP: Create a simple PHP page and browse to IP_Address/phpinfo.php
sudo bash -c "echo -e '<?php\nphpinfo();\n?>' > /var/www/html/phpinfo.php"
4. Download Snipe-IT
Clone recent version of Snipe-IT from GIT into a local folder snipeit.
- Working directory is /var/www
cd /var/www/
- Clone Snipe-IT to local folder snipeit
sudo git clone https://github.com/snipe/snipe-it snipeit
- Make a copy of .env environmental file
cd /var/www/snipeit
sudo cp .env.example .env
- If you like, you can have a quick look inside the .env file with nano editor. We will come back to this file later on. Don’t make any changes to the file and use Ctrl + X to exit
sudo nano .env
5. Configure MySQL Server
Run MySQL secure installation command line wizard and secure the installation.
sudo mysql_secure_installation
- yes or no, if you would like to install Validate Password Plugin (I selected no for this in my lab environment)
- The next part offers you to change the password for the root of MySQL and enter password twice
- The next option to remove anonymous users, I will choose Yes
- The next option to stop root login remotely, I would go for no
- Reload privileges table: Yes
- You will see, “All done”, once it is all done
6. Create an initial database and a user
In this step, we will create database, user and grant specific privileges to new user.
| Database | snipeit |
| User | mysqlsnipeit |
| Password | snipeit |
- Login to MySQL server, provide password for MySQL root user when it prompts
sudo mysql -u root -p
- Create new database snipeit
CREATE DATABASE snipeit;
- Create new user mysqlclient
CREATE USER 'mysqlsnipeit'@'localhost' IDENTIFIED BY 'snipeit';
- Grant permissions to mysqlsnipeit on database snipeit
GRANT ALL PRIVILEGES ON snipeit.* TO 'mysqlsnipeit'@'localhost';
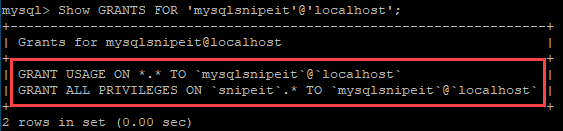
- Verify permissions
Show GRANTS FOR 'mysqlsnipeit'@'localhost';
- Flush privileges
flush privileges;
- Quit
quit;
- Restart MySQL service
sudo service mysql restart
- Check MySQL service status
sudo service mysql status
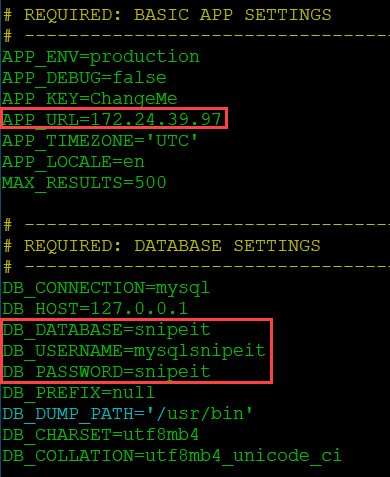
7. Update .env file
Let’s update .env file with the required information.
cd /var/www/snipeit
sudo nano .env
Update the following:
- App_URL
- DB_Database
- DB_USername
- DB_Password
8. Update folder permissions
Update folder permissions in the Snipe-IT root directory
- Working directory is /var/www/snipeit
cd /var/www/snipeit
- Update permissions
sudo chown -R www-data:www-data storage public/uploads
sudo chmod -R 755 storage
sudo chmod -R 755 public/uploads
9. Download Composer
Working directory is logged in user’s home directory. In my case it is /home/snipeit
sudo curl -sS https://getcomposer.org/installer | php
sudo mv composer.phar /usr/local/bin/composer
10. Install PHP dependencies
There are a number of PHP dependencies, ensure these all are successfully installed.
Working directory: Home directory of logged in user
sudo add-apt-repository universe
sudo apt-get install -y git unzip php php-curl php-mysql php-gd php-ldap php-zip php-mbstring php-xml php-bcmath php-tokenizer
11. Install Composer
Working directory: /var/www/snipeit
cd /var/www/snipeit
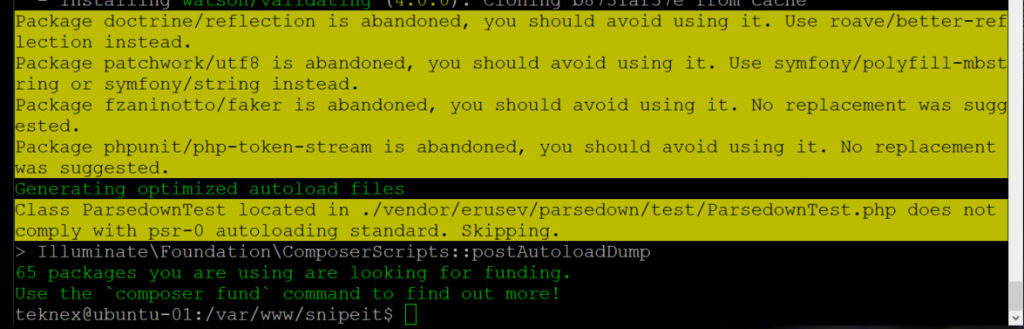
sudo composer install --no-dev --prefer-source
I noticed the following warning when I installed Composer today on 14th August 2021. Even though, this has no impact on the installation whatsoever. I was still able to generate the app key in the next step.
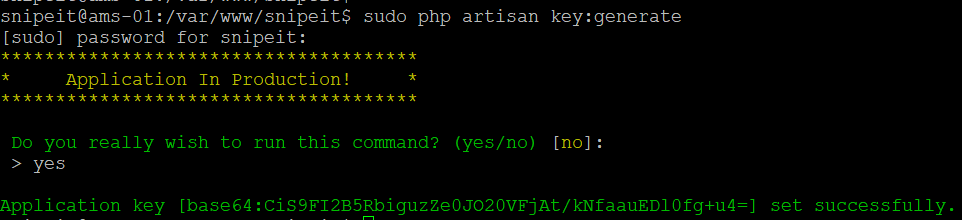
12. Generate App Key for .env file
Run the following command and enter yes when prompted
sudo php artisan key:generate
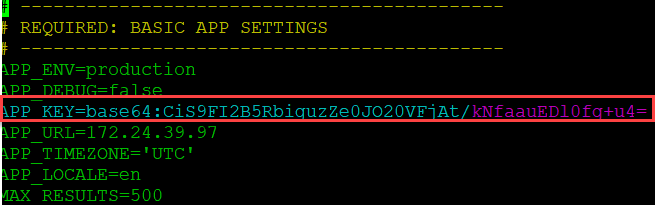
Verify the key generation
View contents of .env file and check APP_KEY value
sudo cat .env
13. Create a new site for Snipe-IT
In this step, we will create a new site for Snipe-IT, copy default site and remove it as well. Also, we will restart the relevant services.
- Create new site with name ams.test.com.conf, you can update this name if you like to something else
sudo nano /etc/apache2/sites-available/ams.teknex.com.conf
- Add site content as follows, update Directory if you download Snipe-IT in a different folder and Server Name to your Ubuntu Server’s IP address
<VirtualHost *:80> ServerAdmin webmaster@localhost <Directory /var/www/snipeit/public> Require all granted AllowOverride All </Directory> DocumentRoot /var/www/snipeit/public ServerName 172.24.39.97 #Redirect permanent / https://snipeit.your-server-fqdn.com/ ErrorLog /var/log/apache2/snipeIT.error.log CustomLog /var/log/apache2/access.log combined </VirtualHost> - Enable new site
sudo a2ensite ams.teknex.com.conf
sudo a2enmod rewrite
- Restart Apache
sudo service apache2 restart
- Disable default site
sudo a2dissite 000-default.conf
- Reload Apache service
sudo service apache2 reload
- Copy default site and remove it
cd /etc/apache2/sites-available
sudo cp 000-default.conf 000-default.confTEMP
sudo rm 000-default.conf
- Reset associations
sudo phpenmod mbstring
sudo a2enmod rewrite
service apache2 restart
14. Snipe-IT pre-flight setup
Browse to IP address of your Ubuntu server and you should see the pre-flight page. Follow the prompts and you are done!!
Your feedback is important for us and other users. Leave it in the comments how did you go with your setup 🙂


October 24, 2020 @ 3:22 am
This is a great outline. Do you have a how to for upgrading to the newest version if you already have it going with these instructions? Snipe-IT released their new version this past week.
October 24, 2020 @ 2:44 pm
Thank you for your feedback.
I made a video on upgrade. Here is the video https://www.youtube.com/watch?v=M17jI71EcKA&t=54s. There is a security risk mentioned in the pinned comment. I will try to post a blog on it and rectify the security risk.
November 4, 2020 @ 1:24 am
great guide worked perfectly, thank you
November 4, 2020 @ 2:43 pm
Excellent 👏
November 16, 2020 @ 4:51 pm
great article, most of the installation guide has some missing points, I tried for 2 days, finally I found myself in your article, now everything working except then date settings. I configured date in env file and also php.ini file. Even that still I see wrong date in Localization menu, time is correct but date is wrong and not changing. Always 2020-11-25. How can I fix this?
November 17, 2020 @ 11:24 am
Thank you.
This is odd, even that date is in future. I will look into this and update you here.
Jay
November 17, 2020 @ 5:00 pm
Also if possible, could you clarify smtp settings, I tried almost all the options which adviced online articles, no luck. I use smtp settings for our exchange server 2016
November 17, 2020 @ 5:24 pm
This is what I have in my docs, however, these are consumer Outlook settings.
MAIL_DRIVER=smtp
MAIL_HOST=smtp-mail.outlook.com
MAIL_PORT=25
MAIL_USERNAME=test@outlook.com
MAIL_PASSWORD=YourPassword
MAIL_ENCRYPTION=TLS
MAIL_FROM_ADDR=test@outlook.com
MAIL_FROM_NAME=’Snipe-IT’
MAIL_REPLYTO_ADDR=test@outlook.com
MAIL_REPLYTO_NAME=’Snipe-IT’
March 2, 2021 @ 9:11 pm
Thanks for your great article.
After all of these steps, when i want to start setup it show me this error
Database D’oh! Looks like we can’t connect to your database. Please update your database settings in your
.envfile. Your database says:SQLSTATE[HY000] [2002] Connection refused (SQL: select 2 + 2)How to fix this issue?
March 3, 2021 @ 11:56 am
Check the MySQL server details in the .env file. If everything is fine there then it would be to do something with the user you created and permissions of this user on snipeit database.
March 5, 2021 @ 4:09 am
Really appreciate this outline. I was wondering if you could provide the command that will take down the test PHP page created by the “sudo bash -c “echo -e ‘<?php\nphpinfo();\n?>’ > /var/www/html/phpinfo.php” command that you provide during the testing phase. It is helpful for testing, but certainly would be nice to take down once it has served its purpose. Thanks!
March 7, 2021 @ 5:57 pm
Thank you for your feedback. I agree with you and will add that step to remove test PHP page.
May 1, 2021 @ 6:57 am
Believe I found the solution:
$ cd /var/www/html/
# Browses to where the phpinfo.php file was created
$ sudo rm phpinfo.php
# Removes the phpinfo.php file containing the PHP info that Apache would display
July 1, 2021 @ 7:01 am
Hi, i did all this
But in the end my preflight test says
“File Owner: It looks like your files are owned by
root, which might be a root/admin account. It’s never a good idea to run a website with escalated priveliges.”Edit: Sorted. Just had to chown -R www-data:www-data /var/www/snipeit
October 10, 2021 @ 11:55 am
Just a heads up, your content should also not be owned by www-data. The only content which should be owned by www-data is the specific files that you need Snipe-IT to be able to modify and specific directories that they need to be able to create or delete files in. This includes the storage and public/uploads directories. The remaining directories and files should not be owned (or writable) by www-data because every file that www-data can write to is a file that an attacker who compromises your web server (including any scripts or web apps that it is running) will be able to replace with whatever malicious data they may choose. All other files should be owned by a non-root user, like Ubuntu.
August 17, 2021 @ 1:03 am
Job for apache2.service failed because the control process exited with error code.
See “systemctl status apache2.service” and “journalctl -xe” for details.
Hi please help me on this
September 10, 2021 @ 11:35 am
How can we enable HTTPS on this local snipe it and with a URL instead of ip address
October 10, 2021 @ 11:58 am
https://gist.github.com/bengriffithsaudio/f2d6d0e7ecf3493c053e6866095e0a77#16-ssl–fqdn-configuration
February 17, 2022 @ 3:10 am
May 30, 2022 @ 6:41 am
> Illuminate\Foundation\ComposerScripts::postAutoloadDump
> @php artisan package:discover –ansi
The environment file is invalid!
Failed to parse dotenv file. Encountered an invalid name at [REQUIRED: BASIC APP SETTINGS].
Script @php artisan package:discover –ansi handling the post-autoload-dump event returned with error code 1
January 18, 2024 @ 4:06 am
I follow as you provide all steps successfully, and i can acess apache2 site also but i getting this error in after exquisite ip
D’oh! Looks like we can’t connect to your database. Please update your database settings in your .env file. Your database says: SQLSTATE[HY000] [1045] Access denied for user ‘itasset’@’localhost’ (using password: YES) (SQL: select 2 + 2)”
After click create new user i got error 500 server